

(A1) Create Class Groups and Communities (New)
(A1) Create Class Groups and Communities (New)
-
From the homepage, open the left menu and click Class Groups, followed by All Class Groups. Alternatively, under the Class Groups tab, click Class Groups.
-
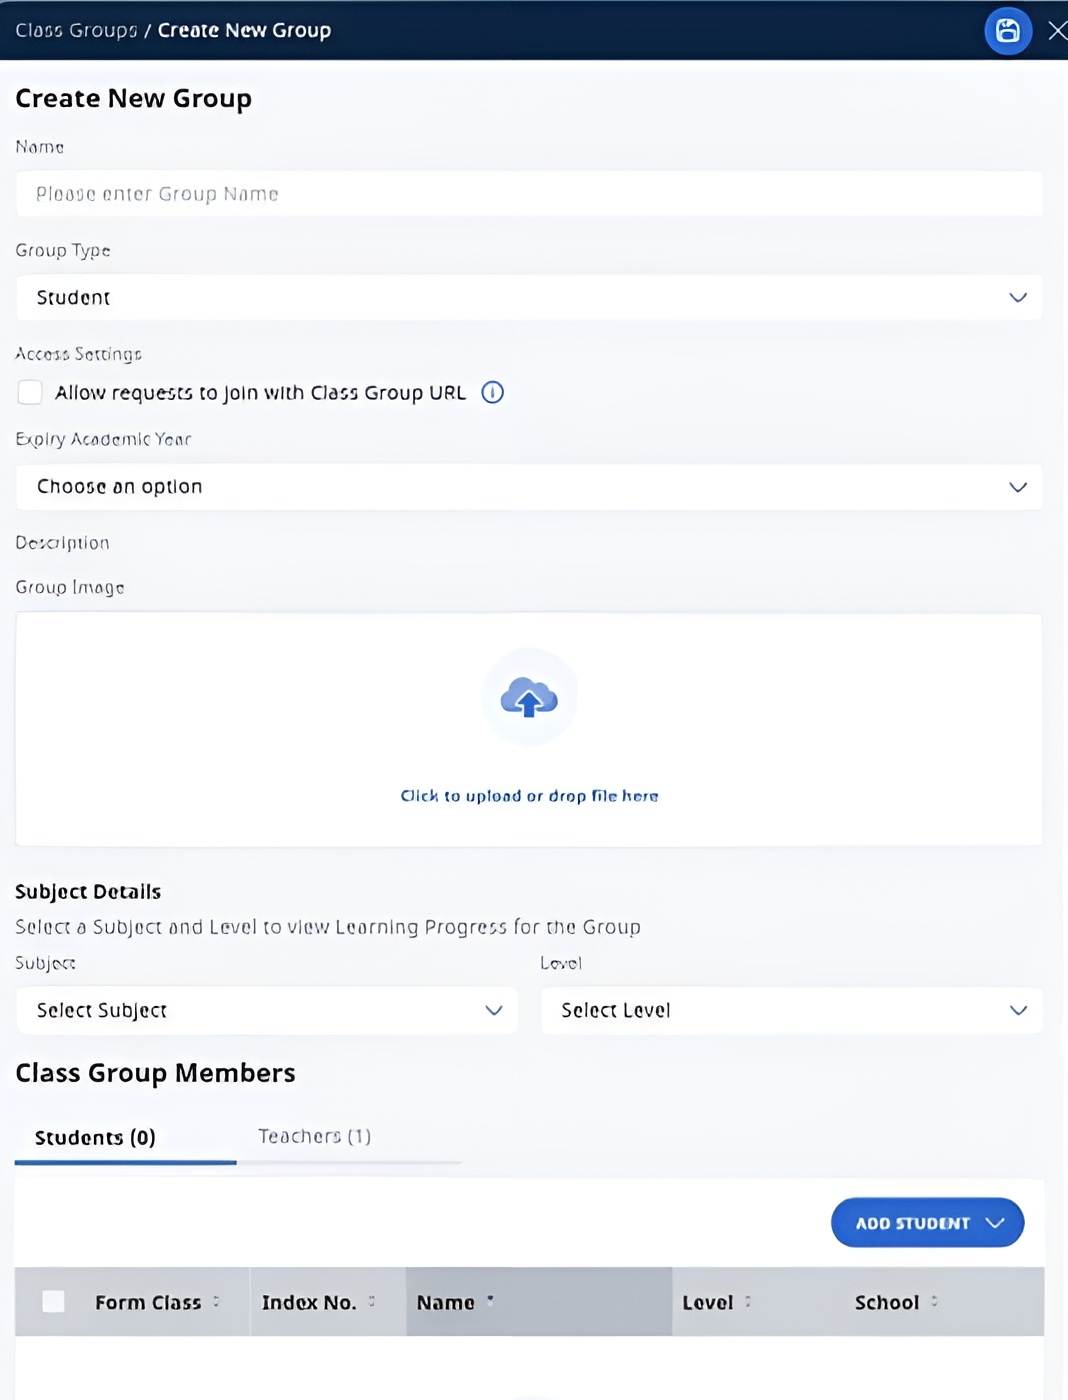
Click Add New Group to open Create New Group subpage. Enter the Name and Expiry Academic Year, Description (optional), Group Image (optional), Subject (optional), and Level (optional). Tagging a Subject and Level to a Class Group allows teachers and students to view the Learning Progress for this Class Group.
Note: From Mar 2025 Update, teachers will be able to set class group expiry year to “No Expiry”.
-
There are 3 Group Types to select from: Student, Professional Development, Staff.
Note: You can convert the Group Type to Community. As communities are only for teachers, please remove students before converting the Group Type. -
Check the Allow requests to join with Class Group URL box to allow teachers and students to join the Class Group without having to be added by the Owner/Co-teacher of the Class Group manually.
Note: You may locate the Class Group URL from the browser's address bar.
-
You can add students from:
-
Your School
-
Your Groups, if you are the Owner of those Class Groups
Note: Students from Class Groups (Class) from School Cockpit cannot be added as a Group.
-
-
You can add teacher users from your school or other schools as Students in your Class Group.
Note: Teachers added as a Student to a Group will only be able to access this Class Group using their accounts in Student View. They will also be given the Liaison Teacher role.
-
You can add teachers with the following roles:
|
Role |
Able to ... |
Remarks |
|
Owner |
• add/remove teachers (Owner only)
|
|
|
• change roles of teachers (Owner only) |
||
|
• add/remove students |
||
|
• archive a Class Group |
||
|
• create/delete Class Group Announcements, Events in Planner, Assignments, Quick Create Activities/Quizzes, Resources and Categories, Topics and Polls in Forum, and Subgroups |
||
|
• change Forum Settings |
||
|
• edit a Class Group description |
||
|
• install/uninstall Apps (Owner only) |
||
|
• manage, edit, pause and monitor Assignments |
Default role when a teacher creates a new Class Group. There can be multiple Owners in a Class Group. |
|
|
Co-teacher |
• same as above (except for Owner only) |
Added by a teacher who is the Owner of a Class Group |
|
Observer (New in R19) |
• add/remove students (from the teacher's school only) |
|
|
• create/delete Class Group Announcements |
||
|
• view events in Planner, Apps, Class Group Details |
||
|
• access Assignments and Class Group Resources |
||
|
• create/delete Posts and Polls in Forum (if permission has been granted) |
Added by a teacher who is the Owner of a Class Group |
|
|
Liaison teacher |
• add/remove students (from the teacher's school only) |
When a teacher is added into a Class Group as a student, the teacher will have a Liaison Teacher role. |
-
When all members have been added, click Save.
Note:
-
Teachers can only add students from their school.
-
To add students from other schools, Group Owners will need to add teachers (minimally as Liaison Teachers) from the same school as the intended students and have these teachers add their students.
-
To add Students from other schools to your own Class Groups, Group Owner can switch students to different Class Groups owned. The system will add the Liaison Teacher into the changed Class Group if a student that is not from your own school is added.
Edit a Class Group Details
-
On the Class Group page, select the relevant Class Group Card.
-
Click the Admin Tab, followed by View & Edit.
-
In the Edit Details subpage, you can change the Name, enter a brief description of your Class Group, add a group image, change the Group type or Expiry Academic Year and add teachers and students. If it is a Group created within SLS, you can also select a Subject and Level from the respective dropdown lists.
Note: Tagging a Subject and Level to a Class Group will allow teachers and students to view the Learning Progress of this Class Group.
-
Click Save to confirm your changes, followed by X.
Create a Community
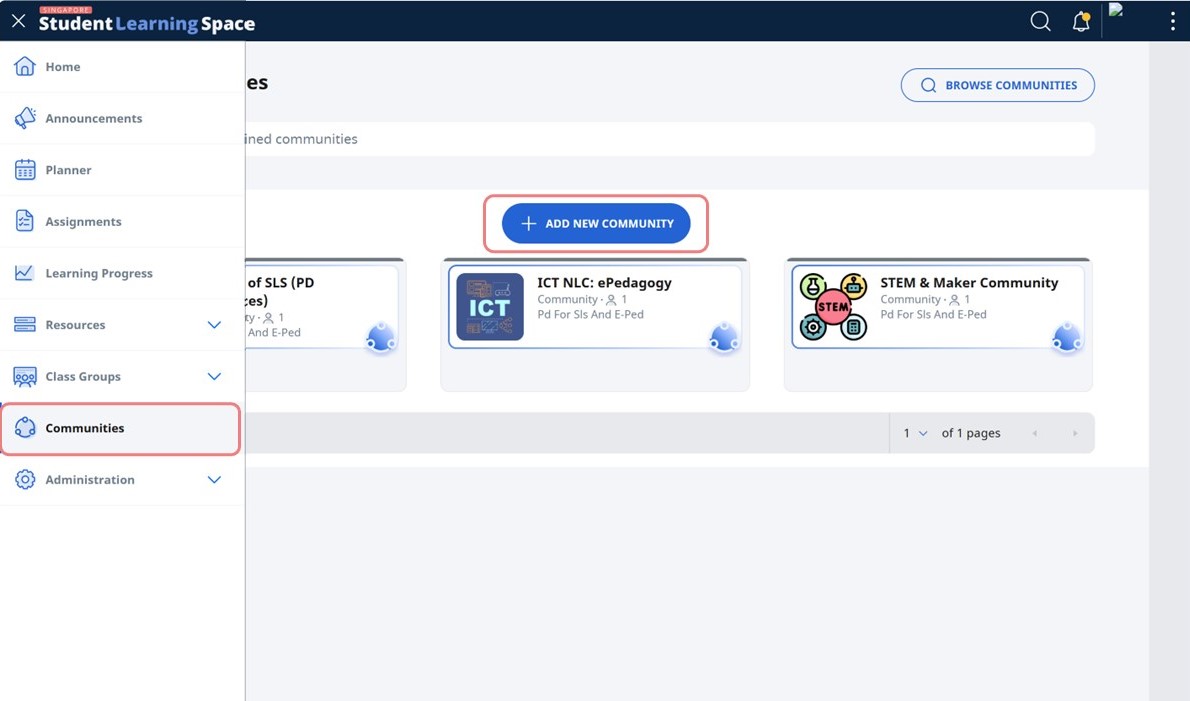
-
From the homepage, open the left menu and click Communities.
-
Click Add New Community to create a new Community. You may also browse or search for joined Communities.
-
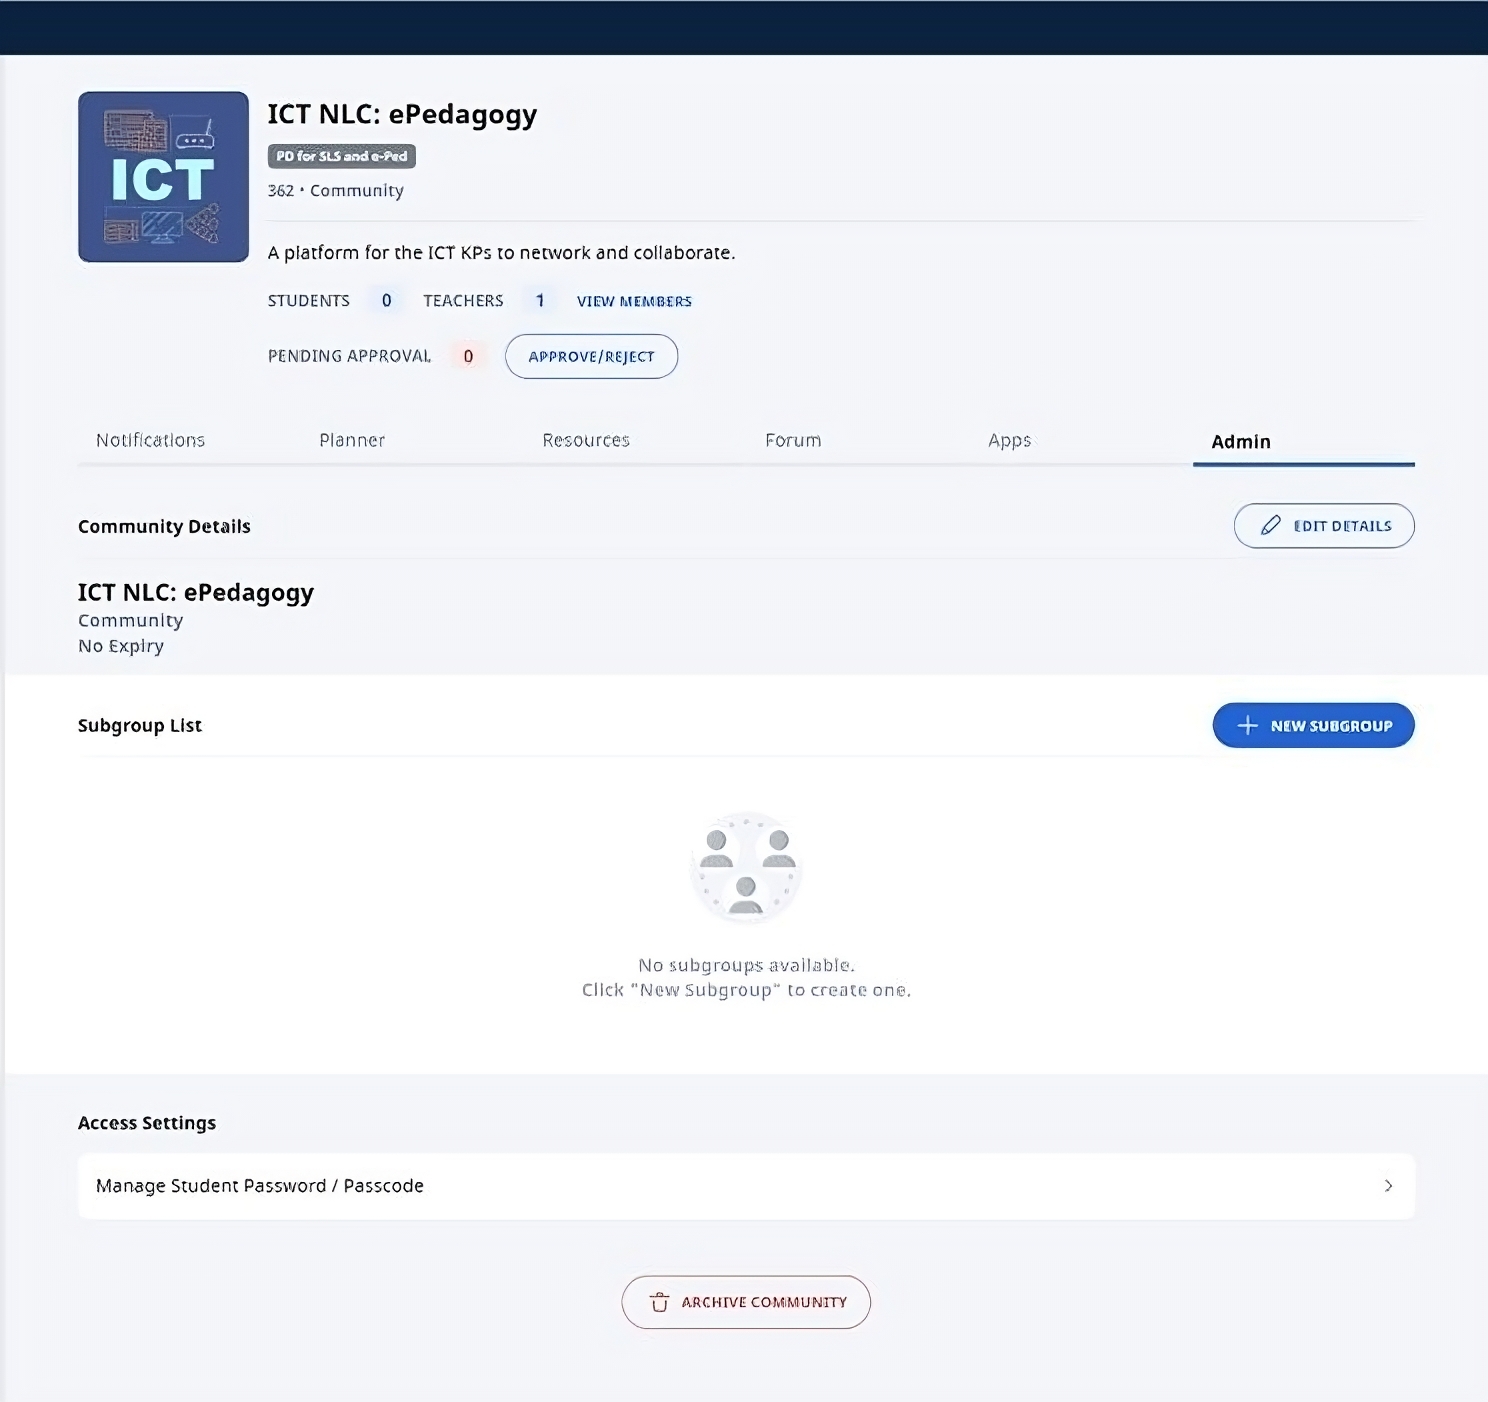
Enter the Name and Expiry Academic Year, Description (optional), Community Image (optional), Subject (optional), and Level (optional). Unlike Class Groups, there is no Learning Progress for Communities.
-
You can add teachers from your school or other schools, and they will be assigned Liaison Teacher role by default. You can change their role to Owner, Co-teacher or Observer. Click Save icon to proceed.
Note:-
You cannot add students into a Community.
-
You can invite teachers to join the Community by sharing the Community URL.

-
-
Your Community has been successfully created.
-
Click on Edit Details to change the Name, Expiry Academic Year, brief description of your Class Group, group image, or add teachers. You can also create Subgroups in a Community.
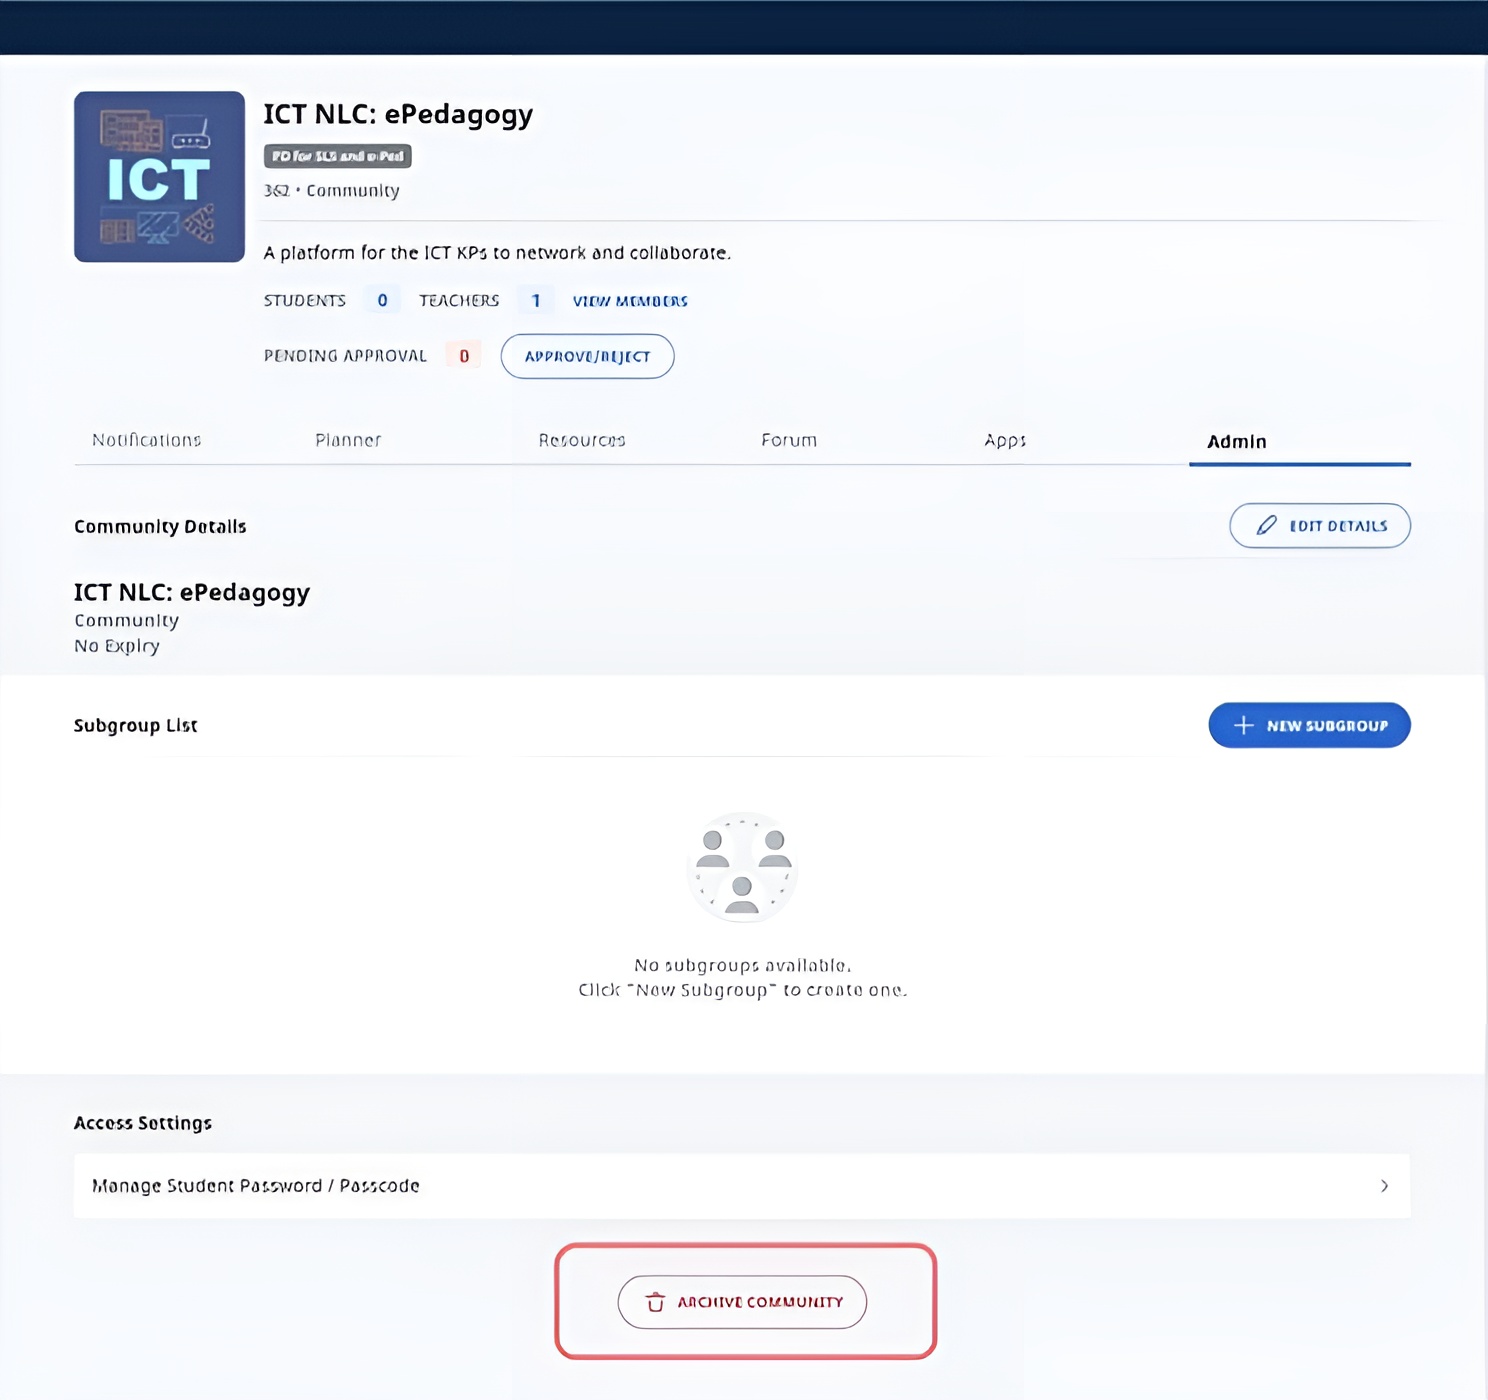
Archive a Community
Communities created in SLS can be archived when they are no longer needed.
-
To archive a Community, enter the Community by clicking the Community card.
-
Under the Admin tab, click Archive Community.
Note:
-
The archiving of Community cannot be undone.
-
Users will no longer be able to access the Community.
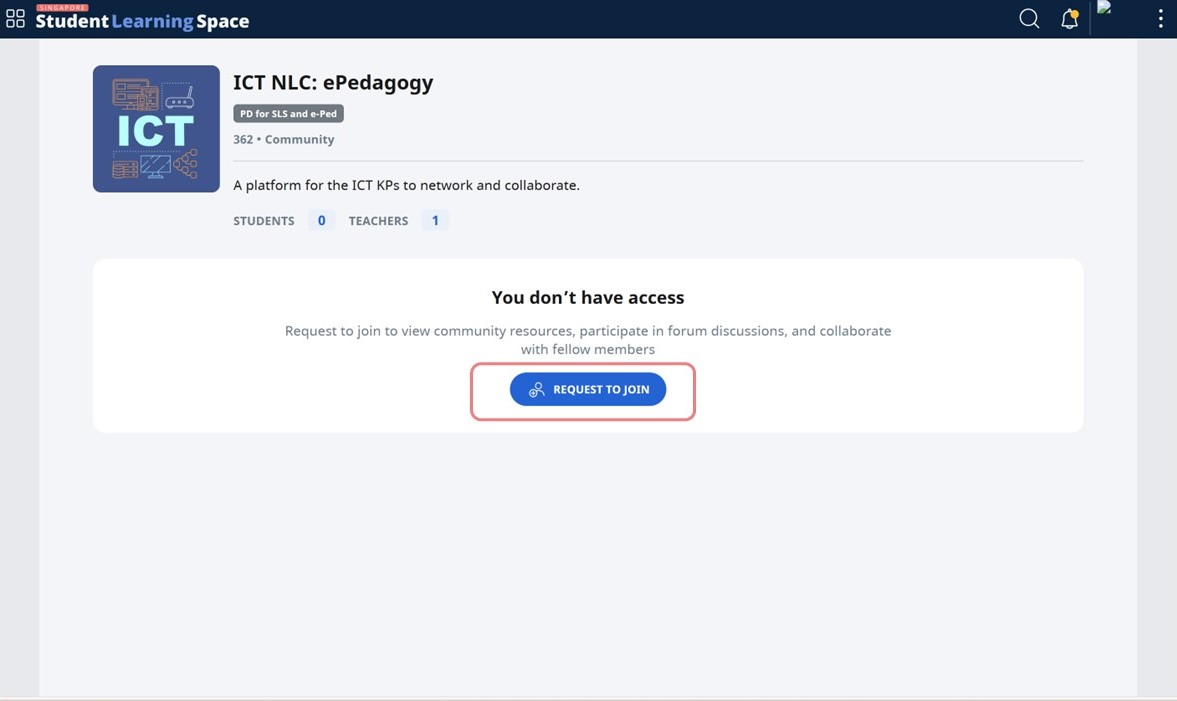
Request to Join a Community
-
When teachers browse for Communities or access a Community URL shared by others, they can send a request to join the Community.
-
Click Request to Join. Teachers will receive a notification when their request has been approved.
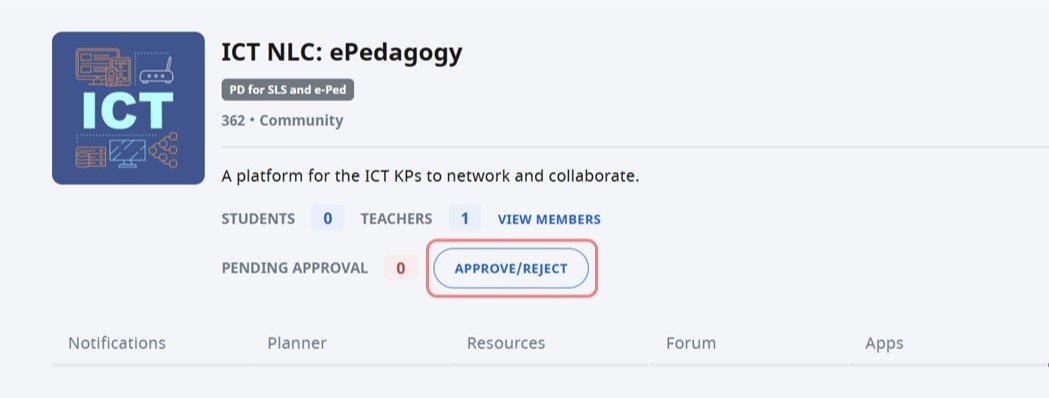
Approve Teachers to Join a Community
-
Click Approve/Reject to view the names of teachers who have requested to join.
-
Check the box next to the name of the teacher, then click Reject or Approve to reject or approve the requests to join the Community.
Note: Owners will also receive notifications when there are requests to join the Community.
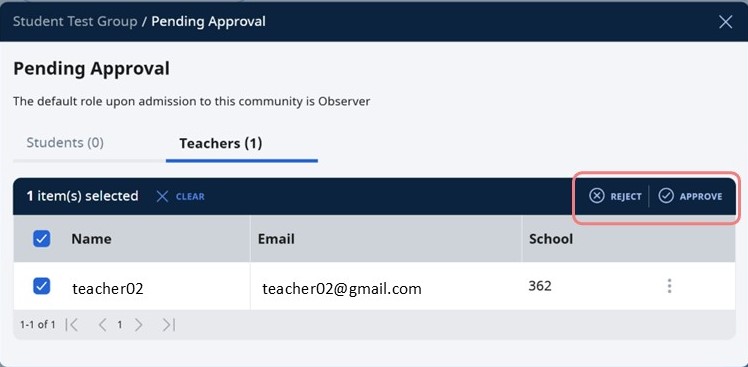
Note: Teachers will be added as an Observer by default.
-